
Tool Drawer Labels: When Labeling Saves Time and When It Adds Clutter
Tool drawer labels save time when they answer one question quickly: which drawer should I open? They add clutter when they try to describe every tool, size, compartment, and future possibility before the storage layout has settled.
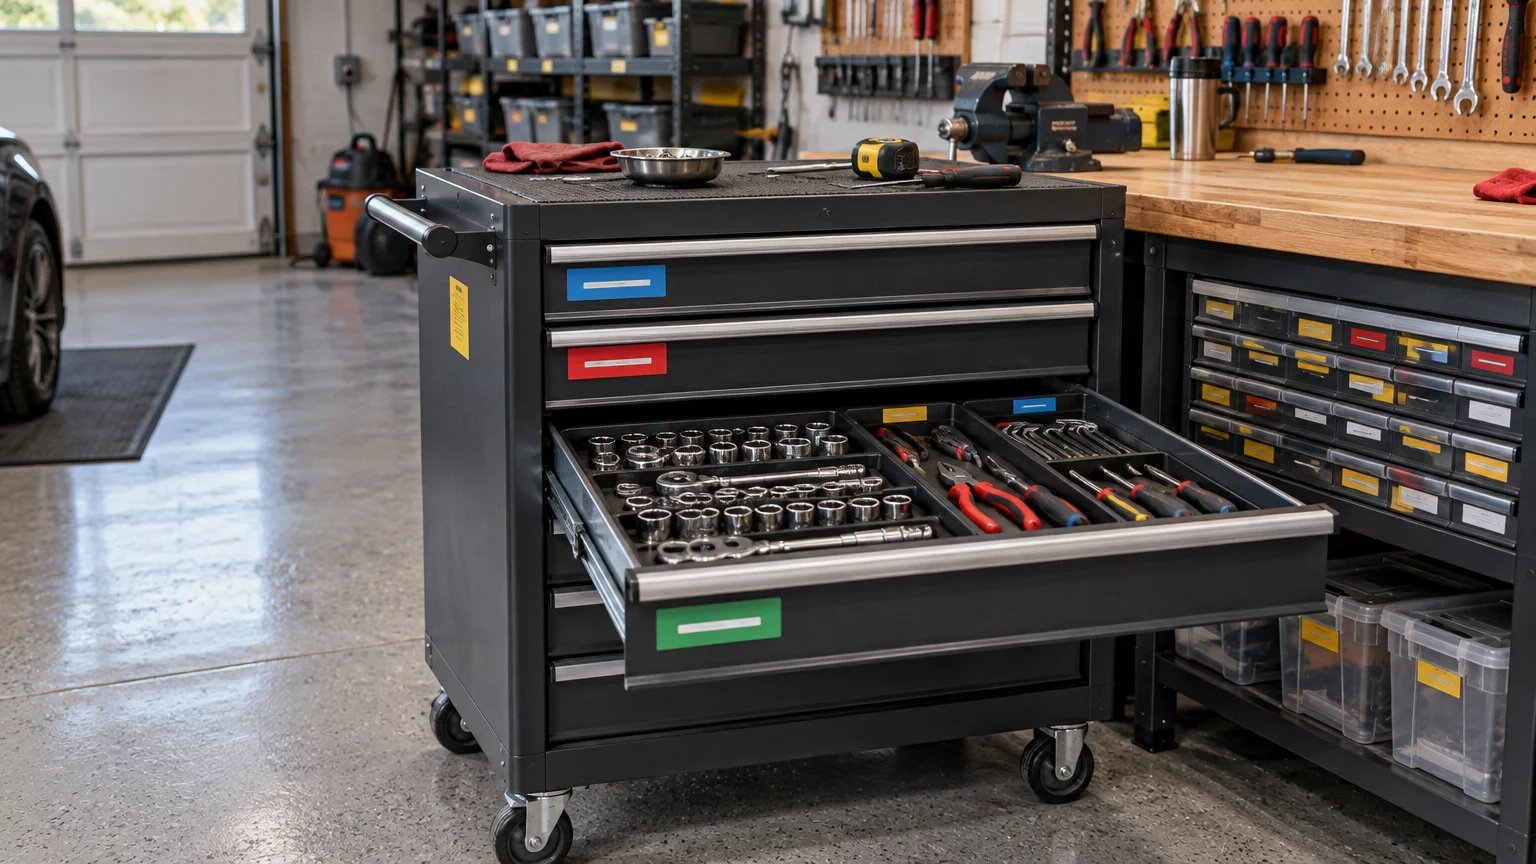
For most home garages, the useful middle ground is simple: label the drawer face by tool family, organize the contents with trays or dividers, and add smaller internal labels only where similar items are easy to confuse. A drawer marked “Sockets & Ratchets” earns its space. Twelve tiny labels listing every socket size usually do not—especially when a molded tray or foam insert already makes the missing size obvious.
What a good drawer label should accomplish
A label is navigation, not decoration. It should shorten the path from deciding what you need to putting your hand on it. The broader idea comes from visual management: assign logical storage locations and make it easy to see whether a needed tool is present, in use, or missing. The Lean Enterprise Institute’s visual-management guidance supports that approach while emphasizing that organization should serve the work rather than become an exercise in applying tools and signs.
A useful label does at least one of three jobs:
- Directs you to the correct drawer without opening several others.
- Separates groups that look alike, such as metric and SAE sockets.
- Helps another person return a tool to the right general location.
Labels are especially valuable on a rolling cabinet with several identical shallow drawers. They also help in shared shops, where the person putting away a tool may not remember the owner’s layout. If you have four drawers and use them every day, however, you may already know their contents by muscle memory. Labeling all four is optional, not a sign that the system is unfinished.
When labels start working against you
More labels do not automatically produce more order. The Lean Enterprise Institute cautions that excessive signs and labels can become counterproductive when they do not help the actual process. Its practical 5S guidance is a useful reminder that visual controls need to match how people really work.
Drawer labeling usually goes wrong in four ways. First, the categories are too narrow, so tools no longer fit after the next purchase. Second, the labels repeat information already visible in a tray. Third, every temporary arrangement receives a permanent label. Fourth, the cabinet becomes a wall of small print that takes longer to scan than an unlabeled row of drawers.
Watch for a simpler warning sign: you regularly ignore the wording. If a drawer marked “Pliers” also contains snips, strippers, crimpers, and small cutters, change the label to “Pliers & Cutters” rather than pretending the original category still works. Labels should describe the working system, not preserve an abandoned plan.
Use three levels of identification
The cleanest arrangement uses different types of identification for different jobs. Do not force the drawer-face label to carry the whole system.
1. Cabinet or zone identification
If you have multiple cabinets, identify each by purpose: hand tools, automotive service, fabrication, electrical, or woodworking. This matters more than labeling every drawer because it gets you to the correct work zone first. It also fits a broader approach in which garage storage follows frequency of use and function rather than whichever container happened to fit.
2. Broad drawer-face labels
Use short categories that can survive normal changes in inventory. Practical examples include Sockets & Ratchets, Wrenches, Pliers & Cutters, Screwdrivers & Bits, Electrical, Measuring & Marking, Drill/Driver Accessories, Fasteners, Sanding & Abrasives, Automotive Service, and PPE. These categories apply visual-management principles without turning labeling into a formal requirement.
3. Internal subgroup labels
Add internal identification only where it prevents a real mix-up. Useful divisions include Metric / SAE, Deep / Shallow, 1/4 / 3/8 / 1/2 Drive, Hex / Torx / Phillips, or Wood / Metal / Masonry Bits. Printed size markings can help when adjacent tools look nearly identical, but trays, dividers, and high-contrast foam may do that job more clearly. Commercial drawer systems use these features for separate purposes: exterior identification guides the user to the drawer, while internal organization keeps tools in position.
Choose a label material for the actual drawer
Paper and ordinary office labels are acceptable for testing a layout, but they tend to look tired quickly around oily hands, cleaners, abrasion, and changing garage conditions. That does not mean every home cabinet needs an industrial identification product. Match the material to the exposure and to how permanent the layout really is.
| Label type | Best use | Main limitation |
|---|---|---|
| Paper or removable label | Testing categories before committing | Low resistance to moisture, dirt, and abrasion |
| Magnetic label | Steel cabinets with layouts that change | Will not work on aluminum, stainless grades with weak magnetic response, or plastic |
| Laminated label-printer tape | Everyday drawer faces and small internal categories | Printer model, tape width, and cartridge compatibility vary |
| Polyester label | Stable layouts exposed to handling, oil, or cleaning | Harder to remove and unnecessary for a temporary arrangement |
| Custom-printed label | Consistent cabinet sets, large text, color coding, or shop identity | Requires the wording and dimensions to be planned before ordering |
Brother offers standard laminated tapes and stronger-adhesive variants, but compatible tape families and maximum widths depend on the printer model. Its laminated tape is described as resistant to water, chemicals, abrasion, and temperature extremes. Check the documentation for your exact printer and tape rather than assuming every cartridge fits.
For more demanding conditions, Brady documents polyester identification materials tested for specified exposure to abrasion, temperature, fuel or oil, and adhesion conditions. Some systems add an overlaminate to protect printing from solvents, outdoor exposure, and washdowns. Those are product-specific capabilities, not permission to treat every polyester sticker as chemically indestructible.
Once the wording and layout are stable, custom-printed labels in consistent sizes and colors can make a bank of cabinets easier to scan. Keep the design restrained: large type, strong contrast, and one color code with a defined purpose will usually outperform a collection of icons, borders, and decorative fonts.
Test the layout before making it permanent
A new cabinet rarely stays arranged exactly as planned. Tool collections grow, awkward items migrate, and the drawer that looked ideal on paper may be too shallow or too far from the workbench. Start with masking tape, removable labels, or magnetic strips. Use the cabinet through several real projects, then revise the categories that cause hesitation.
Move to laminated or polyester labels only after the arrangement proves itself. Material guidance distinguishes repositionable and magnetic options from permanent adhesive products, making a temporary-to-durable progression more sensible than installing permanent labels on day one.
Use this sequence:
- Group tools by task or family, not merely by shape or available drawer space.
- Put frequently used tools between roughly waist and chest height when the cabinet layout permits.
- Write temporary broad-category labels and use the setup during normal work.
- Note every drawer you open by mistake and every tool that lacks an obvious home.
- Revise overlapping categories and add dividers or trays where tools mingle.
- Measure the available flat label area on each drawer pull or face.
- Produce the durable labels only after the wording, position, and hierarchy are stable.
Do not copy dimensions from another cabinet. Drawer size, pull shape, lock-bar clearance, liner thickness, and slide capacity are model-specific. Even products within one manufacturer’s storage range have their own internal dimensions and load ratings.
Prepare the surface so labels stay put
An expensive label applied over oil and silicone residue can fail faster than an ordinary label on a properly prepared surface. Before application, remove dust and contamination with a residue-free cleaner that is compatible with the drawer finish. Let the surface dry completely, align the label without stretching it, and press firmly across the full area.
According to 3M’s pressure-sensitive adhesive guidance, surfaces should be dry and free of contaminants such as dust, oil, oxides, and release agents. Firm pressure improves surface contact, while adhesion can continue developing during the product’s specified dwell time. Do not invent a universal cure period; consult the instructions for the material you bought.
Surface type also matters. 3M classifies metals as high-surface-energy materials, while polyethylene and polypropylene are lower-surface-energy plastics that may need a specially formulated adhesive. A label that grips painted steel well may curl from a plastic parts drawer. If the cabinet includes both materials, test one label on each and leave it in place long enough to expose lifting edges before producing the full set.
Do not confuse organization labels with safety labels
A drawer marked “Chemicals” or “Aerosols” tells someone where a category belongs. It does not communicate the identity and hazards of each product inside. In occupational workplaces, the OSHA Hazard Communication Standard requires hazardous-chemical containers to be labeled, tagged, or marked as applicable. A storage-location label is not a substitute for required container labeling.
The same practical distinction matters at home. Keep products in properly identified containers and retain their manufacturer labeling. Do not pour solvents, fuels, lubricants, or cleaners into an unmarked bottle just because the drawer or cabinet has a category label.
The simplest system is usually the fastest
Start by labeling only the drawers you routinely confuse. Use broad wording on the outside and let trays, dividers, foam, and selective internal labels handle the finer distinctions. Test the arrangement with removable labels, then upgrade the material after the layout survives real projects.
If you can stand in front of the cabinet, read one short label, open one drawer, and find the tool without moving a pile, the system is doing its job. If you need a legend to interpret the labels, the cabinet has become another project instead of a tool.
Frequently Asked Questions
Are tool drawer labels worth using in a home garage?
Yes, when they prevent you from opening several similar drawers or help other people return tools correctly. If you already know a small cabinet by muscle memory, labeling every drawer is optional.
What should tool drawer labels say?
Use short tool-family names such as “Sockets & Ratchets,” “Pliers & Cutters,” “Electrical,” or “Measuring & Marking.” Broad categories stay useful as the collection changes.
Should every tool and socket size have its own label?
Usually not. Add detailed labels only where similar items are easily confused, such as Metric / SAE, Deep / Shallow, or different drive sizes. A tray, divider, or foam insert may show the distinction more clearly.
Which label material works best for tool drawers?
Use paper, removable labels, or magnetic strips while testing the layout. Once the categories are stable, laminated tape or an appropriate polyester label offers a more durable option. Check product and printer compatibility before buying.
How do I keep drawer labels from peeling?
Clean the label area with a finish-compatible, residue-free cleaner, let it dry fully, and press the label firmly over its entire surface. Plastics such as polyethylene and polypropylene may require a specially formulated adhesive.
Does a drawer label satisfy chemical-labeling requirements?
No. “Chemicals” or “Aerosols” identifies a storage location, not the contents or hazards of each container. OSHA requires applicable hazardous-chemical containers in workplaces to be labeled, tagged, or marked.
References
- Don't Start with Tools! – Lean Enterprise Institute
- How Do I Implement 5S? | Lean Enterprise Institute
- Divider for PACKOUT Drawer Tool Boxes | Milwaukee Tool
- Brady Part: JPSL-18-2475 | 176649 | PermaShield UL Approved Permanent Adhesive Polyester Labels with Overlaminate for J7300 Inkjet Printer – 1" x 3" | BradyID.com
- Processing information for 3M™ industrial adhesive tapes
- 3M™ Pressure Sensitive Adhesives
- 1910.1200 – Hazard Communication. | Occupational Safety and Health Administration
- Consumables & Accessories | PT-H103W | United States | Brother
- Can my printer use TZ/TZe tapes? | Brother
- Product spotlight: Harsh environments? No problem | BradyID.com
- PermaShield Polyester Labels with Overlaminate for J4000 Printer | BradyID.com
- Milwaukee PACKOUT™ MODULAR STORAGE SYSTEM
- 56” High Capacity 8-Drawer Steel Storage Chest | Milwaukee Tool