Small Parts Drawers: Labeling and Layout That Stay Useful
TLDR
Use fixed drawers for a large stationary inventory, lidded removable-cup cases for parts that travel to a project, and open-front bins for bulky supplies you grab frequently. Sort each part family before dividing it by size, label every compartment with the information needed to identify and reorder its contents, and keep unknown hardware in a separate triage bin. Place heavy organizers low, protect walking paths, and keep all storage clear of the garage door and its safety sensors.
A garage small parts organizer works only when putting hardware away is almost as easy as taking it out. A cabinet with 60 tiny drawers may look organized on day one, but it will deteriorate quickly if every drawer is too small, the labels are vague, or the cabinet sits across the garage from the workbench.
The practical answer is to match the organizer to how the parts move. Stationary inventory belongs in drawers. Project hardware belongs in a lidded case. Bulky, high-turnover items belong in open bins. Most working garages benefit from a combination rather than one enormous organizer expected to handle everything.
Choose the garage small parts organizer by work pattern
Start with the hardware you already own, not the organizer you want to buy. Spread representative parts on a bench and identify the smallest, longest, bulkiest, and most frequently used pieces. That exercise reveals whether you need shallow drawers, removable cups, open bins, or several formats.
| Organizer format | Best use | Main limitation | Practical placement | Label method |
|---|---|---|---|---|
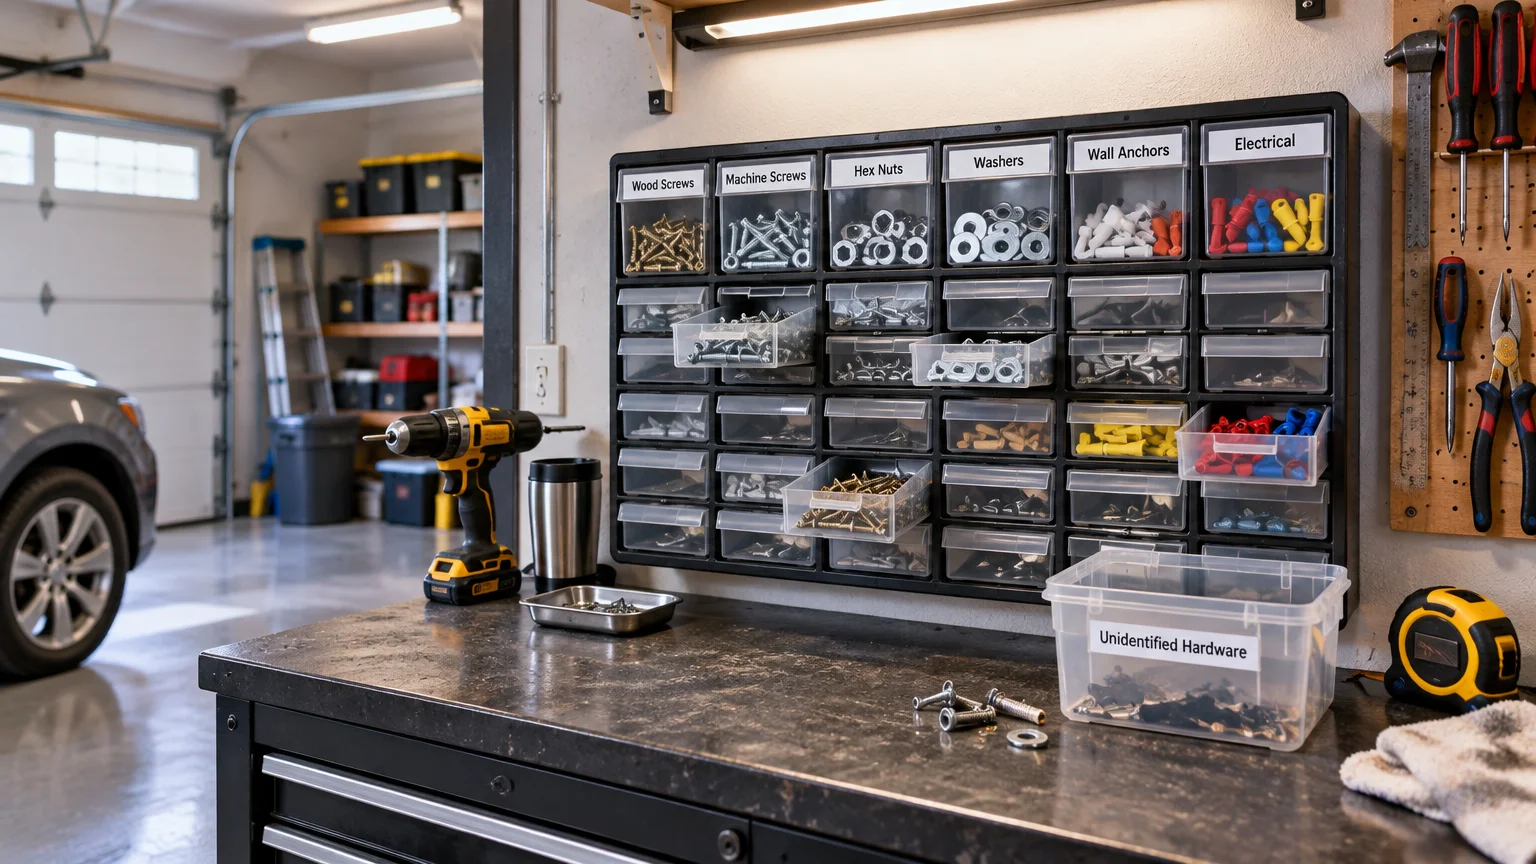
| Fixed small-drawer cabinet | Nuts, washers, machine screws, electrical connectors, clips, and other stationary stock | Awkward for long parts and inconvenient when work moves away from the bench | On a stable bench or properly mounted near the primary work area | Label the drawer face and, if removable, the drawer itself |
| Lidded case with removable cups | Fasteners and connectors carried to vehicles, equipment, or jobs around the house | A heavy case becomes cumbersome, and poor lid retention can let parts migrate | On a shelf between projects; carry it to the job as needed | Label each cup plus the case exterior |
| Open-front bins | Gloves, sanding discs, shop rags, tape, large clamps, and bulky high-use supplies | Dust reaches the contents, and small parts can spill or become mixed | Between waist and shoulder height where practical for frequently used lightweight stock | Use large front-facing category labels |
| Temporary project tray | Disassembled hardware and parts reserved for one active repair | Not suitable for permanent inventory or unrelated leftovers | On the project bench or a dedicated active-work shelf | Add the project name, machine or room, and date |
A fixed drawer cabinet makes sense when the inventory contains many distinct part numbers that rarely leave the workbench. As one scale reference, CRAFTSMAN lists a cabinet with 30 transparent drawers that can be stacked or mounted; its stated dimensions are 14.2 by 6.2 by 17.8 inches. Those dimensions are model-specific, but they illustrate the tall, shallow footprint common to this format.
Portable organizers are better when hardware must travel. Some use removable cups or dividers and lids designed to retain parts in their compartments. A larger example from DEWALT has 10 removable cups, a stated 44-pound capacity, an IP65-rated shell, and outside dimensions of roughly 21-1/8 by 14-5/8 by 5-1/8 inches. Those specifications show why capacity, case weight, shelf depth, and environmental protection should be checked on the exact model rather than assumed.
Buy compartment sizes for actual parts
Tiny compartments are efficient only for genuinely tiny stock. They suit washers, short machine screws, retaining clips, crimp terminals, small fuses, and similar pieces. If a drawer must be shaken or picked clean with fingertips, it is probably too small for frequently used hardware.
Medium compartments should handle common anchors, longer screws, small brackets, wire nuts, automotive clips, and bolts with matching nuts and washers. Reserve large cups or open bins for bulky connectors, long lag screws, caster hardware, sanding accessories, and packages that are easier to identify when kept intact.
Before purchasing anything, make a sample pile from each major hardware family. Arrange those piles by the volume you normally keep. The organizer should hold the working quantity without being packed to the lid. Leave enough room to see the contents and retrieve one piece without dumping the compartment.
Do not multiply compartment sizes without a reason. Two or three useful sizes are usually easier to manage than a patchwork of specialized drawers. When an unusual part does not fit, give it a larger bin rather than forcing it diagonally into a drawer that will jam.
Sort by family first, then by the dimension that matters
Begin with broad families: wood screws, machine screws, nuts, washers, bolts, anchors, electrical connectors, automotive clips, plumbing pieces, and furniture hardware. Do not begin by separating every length on the floor. First remove trash, damaged fasteners, empty packaging, and pieces you cannot identify.
Within each family, use the specification that determines whether the part will fit the job. A useful sorting order is:
- Part family or function, such as machine screw, fender washer, masonry anchor, or insulated terminal.
- Diameter or nominal size.
- Length, where length changes the application.
- Thread pitch or thread system when visually similar parts are not interchangeable.
- Material, finish, head style, drive type, or special use when that distinction matters.
Avoid creating a separate drawer for every possible combination before you have enough stock to justify it. For example, one drawer can hold a few uncommon stainless washers in their labeled package, while frequently used zinc-plated washers may deserve individual size drawers. The system should reflect what you reach for, not the full catalog of hardware that could exist.
Use labels that answer three questions
A useful label tells you what the part is, what size it is, and which detail prevents a wrong substitution. “Screws” is not useful. “#8 × 1-1/4 in. exterior wood screw, T20” is. A metric machine-screw label might read “M6 × 20, 1.0 pitch, hex head.” If the material or finish matters for your work, include it.
Keep the text order consistent across the system: family, size, distinguishing feature, and optional use. Print large enough to read while standing at the cabinet. Use the same abbreviations everywhere, and do not rely only on color because similar shades become difficult to distinguish in weak garage lighting.
Paper inserts behind clear drawer fronts are easy to update. Adhesive labels are better when drawers are opaque or frequently removed, but the surface must be clean and compatible with the label material. For a larger or frequently handled system, custom printed stickers for organizer labels can provide repeated drawer names, size markings, or equipment IDs. Apply labels to both a removable cup and its assigned location so cups return to the right case.
Add a simple reorder mark to high-use compartments. A line on the side of a clear drawer can indicate the minimum useful quantity. When the contents fall below that line, add the part to a shopping list. This is more dependable than trying to remember whether the last handful was used.
Place organizers where they are useful and out of danger
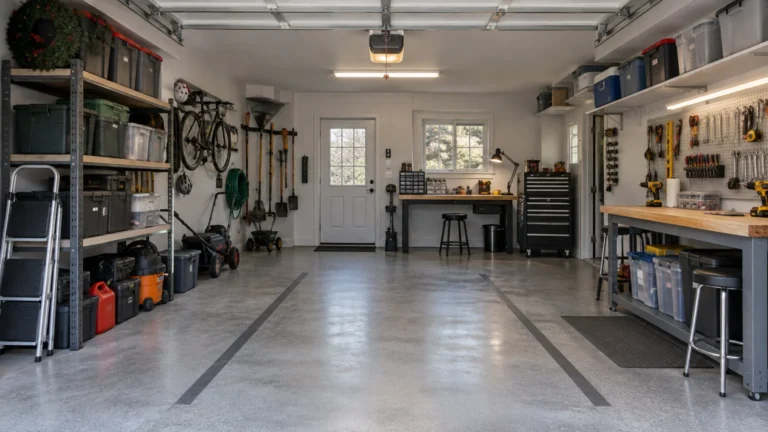
The primary cabinet should be close enough to the workbench that returning one washer does not feel like a separate task. Keep frequently used lightweight parts in the easiest viewing and reaching zone. Put heavier cases and bulk stock lower, where they are less likely to fall and easier to lift without reaching overhead.
Workplace guidance from the Occupational Safety and Health Administration on storage hazards emphasizes clear aisles, observed shelf capacities, stable storage, and lower or middle placement for heavier loads. Those principles translate well to a home garage even though OSHA guidance is written for workplaces. Do not let a rolling organizer, shelf, or stack of cases narrow the normal walking route or create a trip hazard.
Never guess at wall-mounting hardware. Cabinet weight, loaded weight, mounting-hole design, wall construction, and fastener capacity all matter. Follow the organizer manufacturer's instructions and use fasteners suitable for the actual substrate. If documentation does not support wall mounting, place the unit on a stable shelf or bench instead.
Storage must also stay outside the garage door's full travel area. Keep bins, rolling carts, cords, and loose parts away from tracks, the opening, and the safety-sensor path. Genie notes that stored objects can interfere with photo-eye operation and describes the beam as roughly 5 to 6 inches above the floor. Treat that figure as system context, not a universal storage-clearance rule; consult the door and opener manuals for the installed equipment. Regularly checking this area can become part of routine residential garage-door inspection and service.
Keep portable cases from becoming mixed junk boxes
A portable organizer needs a lid that closes firmly against its cups or dividers. Before carrying it, confirm that every cup is seated, no long fastener is bridging compartments, and both latches are fully engaged. Carry the case in its intended orientation and avoid exceeding its stated capacity.
Do not leave loose hardware on top of the cups and expect the lid to contain it. If a project requires more of one part than its normal cup holds, place the excess in a labeled bag inside a larger compartment. After the job, return unused pieces to their home compartments before shelving the case.
Give unidentified hardware a separate triage bin
Furniture leftovers, appliance screws, automotive clips, and mystery brackets should not be mixed into known stock. Put them in a small triage bin or project-specific bag. Label parts with their origin when known: “desk assembly spare,” “mower belt cover,” or “bathroom cabinet hinge.” Context is often more valuable than an uncertain size description.
Review the triage bin on a set schedule. Identify and file genuinely useful parts, move machine-specific spares to that machine's service kit, and discard damaged or valueless pieces appropriately. A small triage bin is a useful buffer; a five-gallon bucket of unknown metal is postponed sorting.
Keep leaking containers, wet materials, sharp blades without protective packaging, and loose batteries with exposed terminals out of an ordinary hardware organizer. Chemicals, fuels, paints, and other regulated or hazardous products need storage appropriate to their labels and risks, not spare plastic drawers.
Use a five-minute reset after every project
- Return known leftovers to their labeled compartments.
- Place unidentified pieces in the triage bin instead of guessing.
- Remove damaged fasteners and empty packaging.
- Check portable cups and dividers before closing the case.
- Add low-stock items to the shopping list.
- Change any label that no longer matches its contents.
- Sweep loose hardware from the bench and floor before it becomes a tire or foot hazard.
The best next step is not to classify every miscellaneous fastener in the garage. Choose one family—perhaps wood screws, machine hardware, or wall anchors—and organize it completely in one suitable format. Use that small system for a few projects, correct the labels and compartment sizes that cause friction, and then expand. A garage small parts organizer stays useful when its layout follows real work and its reset is easy enough to repeat.