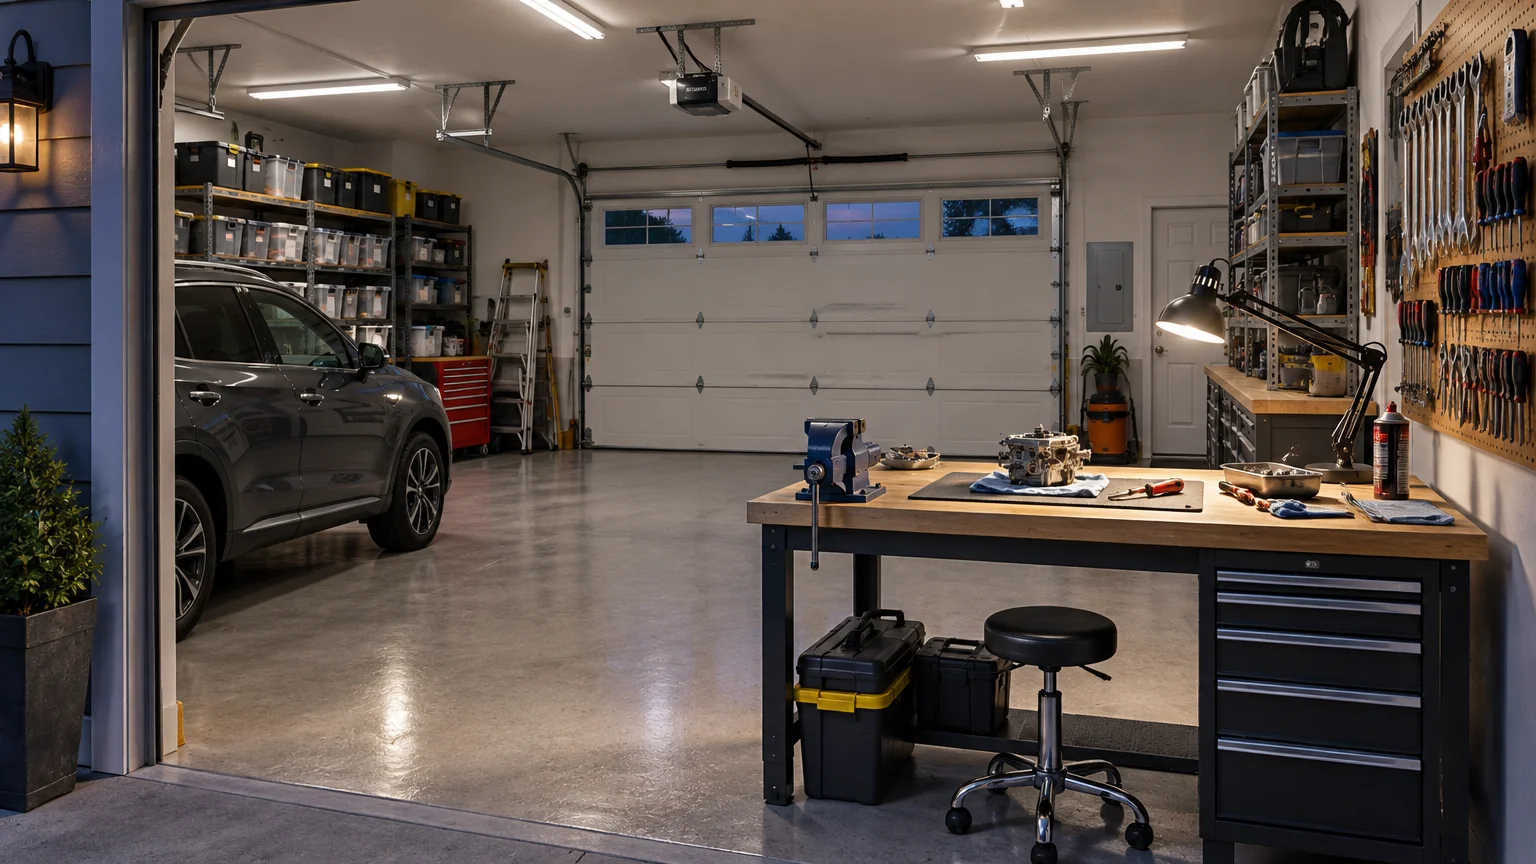
Task Lighting vs General Lighting in a Workshop
TLDR
The practical answer to task vs ambient garage lighting is that a working garage needs both. Ambient fixtures provide broad, even light for parking, walking, cleaning, and finding stored items. Task fixtures concentrate light where you handle fasteners, read labels, inspect finishes, or use tools. Plan the ambient layer around the room and its obstructions, then add separately controlled task lighting at every place where precision matters.
A bright ceiling fixture does not automatically produce a well-lit workshop. Your body, an open hood, wall cabinets, door tracks, and shelving can block overhead light exactly where you need it. The better approach is layered lighting: broad ceiling coverage, fixed lights for repeat work areas, and a portable inspection light for jobs that move.
Task vs ambient garage lighting at a glance
| Lighting layer | Main purpose | Useful locations | Common mistake |
|---|---|---|---|
| Ambient lighting | Makes the garage broadly visible and easy to navigate | Parking bays, walking routes, storage aisles, entrances and open floor areas | Using one intense central fixture that leaves edges and vertical surfaces dark |
| Task lighting | Illuminates a specific job or work surface | Workbench, sink, cabinets, sharpening station and repair area | Mounting the light behind the person, causing the worker to cast a shadow |
| Vertical or fill lighting | Reveals wall storage, vehicle sides and upright surfaces | Tool walls, shelves, cabinets and detailing areas | Adding more ceiling output when the real problem is poor lighting direction |
| Portable inspection lighting | Follows work that changes position | Under a hood, beneath equipment, inside cabinets and around wheels | Relying on a loose cord or unstable lamp in a busy path |
Start with the jobs, not the fixtures
Before shopping, sketch the garage from above. Mark the parked vehicles, workbench, tool wall, shelving, cabinets, door-to-house route, garage-door tracks, opener rail, ceiling storage, and receptacles. Then list what happens in each zone.
- Parking and walking require broad, dependable ambient coverage.
- Storage retrieval needs light at shelf faces, not only on the floor.
- Bench work needs direct light across the entire working area.
- Vehicle repair needs movable light that can reach under the hood, around wheels, or beneath components.
- Detailing and finish inspection benefit from even light across vertical and curved surfaces.
- A sink, grinder, charging shelf, or cabinet station may need its own fixed task light.
This map prevents a common planning failure: laying out symmetrical rows of fixtures before accounting for the objects that interrupt their light. A garage door in the open position can sit below ceiling fixtures. Tracks and opener hardware constrain mounting locations, while a vehicle can turn one ceiling row into a line of hard shadows.
Build an even ambient layer
Ambient garage lighting should let you enter, park, walk around vehicles, open storage, and clean without moving a lamp. Evenness matters more than creating one spectacularly bright patch. Several sensibly distributed fixtures will usually control shadows better than one high-output unit in the center.
Lay out the ceiling coverage around real obstructions. Check what happens with the overhead door fully open, and keep fixtures clear of door travel, tracks, springs, opener components, and hanging storage. Light both sides of the parking area when possible rather than placing all the output directly over a vehicle roof. Extend coverage toward storage edges and the normal route between the exterior door, vehicle, and house entrance.
When comparing products, use lumens to compare light output rather than treating watts as a brightness rating. Watts describe energy use, while lumens describe light output. The FTC’s light-bulb shopping guidance explains this distinction. Fixture distribution still matters: two products with similar lumen ratings can put light in different places because of their lenses, reflectors, mounting heights, and beam patterns.
Put task lighting where your hands work
A task light should illuminate the work surface from a useful direction without shining directly into your eyes. At a bench, that normally means placing the fixture forward of your head and shoulders rather than directly behind you. The goal is to keep your body from blocking the beam while limiting reflections from polished tools, metal parts, and glossy finishes.
For a long workbench, use lighting that covers the working length instead of creating one bright circle in the middle. Under-cabinet fixtures can work well when cabinets are deep enough to conceal the light source from normal sightlines. An adjustable arm or directional fixture is useful for inspection, soldering, sharpening, assembly, and other jobs where the target changes.
Judge the result at the task surface. The Illuminating Engineering Society distinguishes illuminance at a defined measurement location, including the work plane, from light measured elsewhere. Its illuminance guidance supports evaluating the bench, tool wall, or repair point where the work actually occurs—not merely how bright the garage floor looks.
Tool walls and shelving often need light aimed toward their vertical faces. This makes sockets, hand tools, bins, and small-part drawers easier to identify. Clear, consistent labels help too; if the wall is being reorganized, weather-resistant labels and custom stickers for tool drawers and storage bins can make frequently used equipment easier to return to the correct location.
Use portable lights for vehicle work
Fixed ceiling lights cannot follow every automotive task. An open hood blocks overhead light, wheel wells remain recessed, and the useful angle changes as you move. Use a stable portable inspection light, preferably with a protected lens and a mounting method suited to the job, as a supplement rather than a replacement for room lighting.
Plan the cord or charging location as carefully as the lamp. Keep cords away from vehicle paths, door travel, sharp edges, hot components, and wet areas. Do not hang a light by its cord or route an extension cord as permanent wiring.
Fix shadows, glare, and dark walls separately
Adding more ceiling output is not a universal fix. First identify which of these three failures you actually have.
- Body-cast shadows: Move or add task lighting so light reaches the work from in front of or beside the operator. Two-direction lighting can help at benches where hands frequently block one beam.
- Glare: Shield the source, change its angle, use a diffusing lens, or move it outside the normal line of sight. Glare is a recognized lighting-performance concern, not merely an annoyance.
- Dark vertical surfaces: Aim a separate fixture toward shelves, pegboard, cabinets, or vehicle sides. Ceiling brightness alone may not reveal these surfaces.
- Reflections: Reposition the fixture so bright images do not bounce from polished metal, glass, paint, or a glossy worktop into your eyes.
Test a proposed position before permanently mounting the fixture. A temporary work light can reveal whether your head, shoulders, cabinet doors, or an open vehicle hood will block the beam. Check the setup while standing and sitting, and from both ends of the bench.
Choose color and controls for the work
Correlated color temperature describes whether white light appears warmer or cooler; it is not a complete measure of lighting quality. Consistency is often more useful than chasing an extreme color appearance. Noticeably different lamps in the same work zone can make paint, wood, wiring, and finishes appear inconsistent as you move them around.
Color rendering index, or CRI, describes color fidelity. The U.S. Department of Energy says CRI 80 is generally recommended for interior lighting and identifies CRI 90 or higher as excellent color fidelity, while cautioning that CRI does not describe every aspect of color quality. Better color fidelity is particularly useful for wire identification, detailing, paint touch-up, stain selection, and finish inspection.
Put lighting layers on controls that match how they are used. Ambient lights near the entry can work well with an occupancy sensor. A workbench usually benefits from a manual switch or a sensor arrangement that will not turn off while you remain relatively still. Manufacturer guidance indicates that occupancy-sensor performance depends on placement and detection conditions, so one sensor configuration should not be assumed to suit both a walking route and detailed bench work.
- Control the main ambient fixtures independently from bench lights.
- Give fixed workstations their own convenient switches.
- Use a longer-delay or manual control where still, concentrated work could be mistaken for vacancy.
- Consider separate control for storage or detailing lights that are not needed during every visit.
- Confirm that fixtures, dimmers, drivers, and sensors are mutually compatible before installation.
Buying and pre-installation checklist
- Output: Compare lumens, then consider where the fixture distributes that light.
- Coverage: Check the mounting position, beam pattern, fixture length, and nearby obstructions.
- Color: Select a suitable color appearance and use adequate color rendering for the work.
- Glare control: Look for shielding, diffusion, or a mounting arrangement that hides intense sources from normal sightlines.
- Environment rating: Verify the manufacturer’s dry, damp, or wet-location rating for the intended location.
- Temperature range: Confirm that the fixture and driver are rated for expected garage temperatures.
- Mounting: Check clearances from the garage door, tracks, opener, cabinets, and storage.
- Controls: Verify dimmer and occupancy-sensor compatibility rather than assuming every LED fixture supports them.
- Electrical safety: Look for a certification mark from a recognized testing organization. OSHA explains that Nationally Recognized Testing Laboratories test and certify products to applicable safety standards.
- Electrical capacity: Confirm circuit capacity, receptacle condition, grounding, and the manufacturer’s input requirements before adding permanent equipment.
Garages are among the locations covered by GFCI guidance for receptacles, but locally adopted electrical codes, amendments, and permit requirements vary. A product certification mark also does not settle every installation question. Consult a qualified electrician when adding a circuit, extending permanent wiring, replacing questionable receptacles, or working near a panel. Never assume that an existing garage circuit has spare capacity simply because an outlet is available.
Is one row of shop lights enough?
It depends on the garage shape, fixture distribution, mounting height, parked vehicles, door position, and the work being performed. One row may provide basic circulation light in a narrow bay, yet still leave a bench, shelf face, or vehicle side in shadow. Rather than relying on a universal fixture count, evaluate each zone with the door open and closed, vehicles parked, and the operator standing in the normal working position.
The same reasoning explains why task lighting cannot replace ambient lighting. A bench lamp may be excellent at the vise but does nothing for a dark walking path behind a vehicle. Conversely, a bright ceiling does not guarantee that you can see a recessed fastener or inspect a paint finish. Each layer solves a different problem.
The practical next step
Draw the garage and mark the floor routes, work surfaces, vertical storage, vehicle repair range, door hardware, and ceiling obstructions. Plan broad ambient coverage first. Then add fixed task lights to repeat work zones and a portable inspection light for changing jobs. Put those layers on sensible controls and verify every fixture’s ratings and installation requirements before buying.
A successful garage-lighting plan is not the one with the greatest advertised output. It is the one that puts comfortable, dependable light where you walk, where you reach, and where your hands actually do the work.
References
- Shopping for Light Bulbs | Consumer Advice
- Illuminance Selector: FAQs – Illuminating Engineering Society
- Glare | Department of Energy
- Downlights Key Product Criteria | ENERGY STAR
- LED Basics | Department of Energy
- PIR Occupancy Sensor
- OSHA's Nationally Recognized Testing Laboratory (NRTL) Program | Occupational Safety and Health Administration
- How to Use GFCIs – Electrical Safety Foundation International